PLEASE NOTE
Note that the following instructions are for a Comodo PositiveSSL certificate / bundle. This process should be similar to other commercial SSL providers.
In recent times, our recommendation for all network downstream sites is to have them submit a Certificate Signing Request (CSR) to the Hub for signing, in which a signed certificate is then sent back along with the Hub's CA and HTTPS certificate. Sites then import the certs into their shrine.keystore and configure shrine.conf and server.xml to look at that keystore to serve SHRINE.
A typical keystore after importing all the certs in would look like this:
Keystore type: jks
Keystore provider: SUN

Your keystore contains 3 entries

acttest.harvardshrine.net, Oct 31, 2018, PrivateKeyEntry,
Certificate fingerprint (SHA1): 26:0B:FE:98:21:BA:C8:5A:A5:F5:35:79:8E:81:1A:E9:F4:3B:FF:56

shrine-act-test-ca, Jul 31, 2019, trustedCertEntry,
Certificate fingerprint (SHA1): 13:4D:B5:5C:E3:48:A0:7B:9B:20:22:8B:0B:C1:BE:DD:B9:E4:1B:AD

shrine-act-test.hms.harvard.edu, Jul 31, 2019, trustedCertEntry,
Certificate fingerprint (SHA1): 52:82:A0:6D:D1:48:B2:EA:BB:2C:58:BD:E5:C7:3B:21:75:2B:46:F6
Their shrine.conf keystore block would look like this:
keystore {
    file = "/opt/shrine/shrine.keystore"
    password = "xxxxxx"
    privateKeyAlias = "acttest.harvardshrine.net"
    keyStoreType = "JKS"
    caCertAliases = ["shrine-act-test-ca"]
  }
And their server.xml 6443 Connector block would look like this:
<Connector port="6443" protocol="org.apache.coyote.http11.Http11NioProtocol"
               maxThreads="150" SSLEnabled="true" scheme="https" secure="true"
               clientAuth="false" sslProtocol="TLS"
               keystoreFile="/opt/shrine/shrine.keystore"
               keystorePass="xxxxxx"
               keyAlias="acttest.harvardshrine.net"/>
The problem with this is that when you start Tomcat and then navigate to the SHRINE login page, you're greeted with a browser exception warning. This warning is because the CSR that the HUB CA signed is not a publicly recognized CA, therefore it's treated like a "self-signed" certificate. The end-user will then need to click through the warning to add an exception to the site. This can get taxing for larger institutions and will be tedious for each user.
So, a solution for this is to utilize a commercial SSL cert to serve the SHRINE application through Tomcat. You will need to create a CSR from your existing shrine.keystore to send to the commercial provider to get a SSL cert back. For example, ComodoSSL will send back 4 certificates (after sending them the CSR):
- AddTrustExternalCARoot.crt
- SectigoRSADomainValidationSecureServerCA.crt
- USERTrustRSAAddTrustCA.crt
- acttest_harvardshrine_net.crt
First, you'll need to bundle up the certs into a chained cert. It's important to add these certs in the correct order, which you can discern from getting the details from each cert. Each cert will refer to the next level cert. Typically, you'll be adding the domain cert + intermediate 2 + intermediate 1 + root.
cat acttest_harvardshrine_net.crt SectigoRSADomainValidationSecureServerCA.crt USERTrustRSAAddTrustCA.crt AddTrustExternalCARoot.crt > chain.crt
After you have created the chained cert, you will now need to extract the private key from the shrine.keystore that you had initially created:
openssl pkcs12 -in shrine.keystore -nodes -nocerts -out private_key.pem
Keep this private key safe in a secure directory!
For generated private keys
NOTE: If you had previously generated your own private key to acquire the commercial SSL cert, you can use that private key for the next steps, as the private key extracted from the shrine.keystore will not match the private key in the commercial SSL cert.
Next, once you have the private key, you'll need to combine the chained cert and the private key into a PKCS12 package (.pfx) in order to import back into the shrine.keystore:
openssl pkcs12 -export -in chain.crt -inkey private_key.pem -out chain.pfx
Once you have the PKCS12 package, you'll now need to import this into your existing shrine.keystore:
keytool -importkeystore -deststorepass xxxxxx -destkeystore shrine.keystore -srckeystore chain.pfx -srcstoretype PKCS12 -alias acttest.harvardshrine.net-https
Once imported in, your shrine.keystore should look like this:
Keystore type: jks
Keystore provider: SUN


Your keystore contains 4 entries
acttest.harvardshrine.net, Oct 31, 2018, PrivateKeyEntry,
Certificate fingerprint (SHA1): 26:0B:FE:98:21:BA:C8:5A:A5:F5:35:79:8E:81:1A:E9:F4:3B:FF:56

acttest.harvardshrine.net-https, Jul 31, 2019, PrivateKeyEntry,
Certificate fingerprint (SHA1): EF:AF:5E:D3:1A:97:AA:F2:6D:50:B8:9A:23:98:B5:2C:0C:18:C3:4B

shrine-act-test-ca, Jul 31, 2019, trustedCertEntry,
Certificate fingerprint (SHA1): 13:4D:B5:5C:E3:48:A0:7B:9B:20:22:8B:0B:C1:BE:DD:B9:E4:1B:AD

shrine-act-test.hms.harvard.edu, Jul 31, 2019, trustedCertEntry,
Certificate fingerprint (SHA1): 52:82:A0:6D:D1:48:B2:EA:BB:2C:58:BD:E5:C7:3B:21:75:2B:46:F6
Now, keeping everything the same in shrine.conf, you will need to switch the alias entry in Tomcat's server.xml to point to the newly imported certificate package:
<Connector port="6443" protocol="org.apache.coyote.http11.Http11NioProtocol"
               maxThreads="150" SSLEnabled="true" scheme="https" secure="true"
               clientAuth="false" sslProtocol="TLS"
               keystoreFile="/opt/shrine/shrine.keystore"
               keystorePass="xxxxxx"
               keyAlias="acttest.harvardshrine.net-https"/>
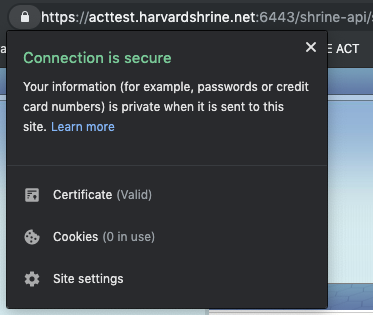
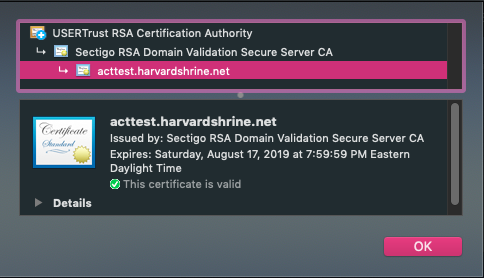
Once that change is made, you will need to restart Tomcat services. Once things are back up, you should see a valid certificate ("lock") when you navigate to the SHRINE application:
Overview
Content Tools